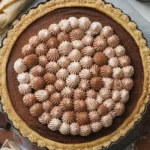
Delicious Tiramisu Tart Recipe for Sweet Moments
Tiramisu Tart Recipe lovers, you know that moment when you want a sweet to share, but you also want it to feel elegant and easy? I’ve been there. That’s why I’m sharing my go to, the Delicious Tiramisu Tart Recipe for Sweet Moments, the one I make when friends come over or when I want a no fuss dessert that still tastes special. It’s creamy, coffee kissed, and surprisingly simple. No pastry school skills needed, just a few smart moves and a little chilling time. Ready to make something that feels cozy and impressive at the same time?

Recipe Notes
This is my relaxed take on tiramisu, shaped like a tart for easy slicing and a clean look. The base is a chocolate cookie crust that holds everything without getting soggy. The filling is silky mascarpone lightened with softly whipped cream, and the espresso shines through without overpowering. The Delicious Tiramisu Tart Recipe for Sweet Moments is the kind of dessert that feels celebratory but is absolutely weeknight possible.
Ingredients
- Crust: 2 cups chocolate wafer or Oreo crumbs, 6 tablespoons melted unsalted butter, pinch of salt
- Espresso layer: 1/2 cup strong espresso, cooled; 1 to 2 tablespoons coffee liqueur or dark rum, optional
- Filling: 1 cup cold heavy cream; 8 ounces cold mascarpone cheese; 1/3 cup powdered sugar; 1 teaspoon vanilla extract; small pinch of salt
- Topping: unsweetened cocoa powder for dusting; dark chocolate shavings, optional
Directions
- Heat the oven to 350°F. Mix cookie crumbs, melted butter, and salt until evenly moistened. Press into a 9 inch tart pan with a removable bottom.
- Bake 8 to 10 minutes, just to set. Cool completely. You want it crisp before adding the filling.
- Stir espresso with liqueur if using. Lightly brush or spoon a thin layer over the crust. It should be damp, not drenched.
- Whip the cold heavy cream to soft peaks. Stop as soon as the whisk lines stay visible. Over whipping makes it grainy.
- In another bowl, beat mascarpone with powdered sugar, vanilla, and salt until smooth and fluffy, about 30 to 45 seconds. Do not overmix.
- Fold the whipped cream into the mascarpone gently until it’s thick and cloud like. Spread into the cooled crust and smooth the top with an offset spatula.
- Chill at least 4 hours or overnight. Right before serving, sift a generous layer of cocoa on top and finish with chocolate shavings if you like.
Make it extra safe: If you prefer traditional tiramisu with egg yolks, use pasteurized eggs and cook the yolks with sugar over a simmering pot until thick, then cool before folding into mascarpone. The version above is egg free, simple, and super creamy.
If you enjoy simple yet classy desserts, you might also fall in love with an easy French apple tart for fruit forward days. The tart you’re making now is your coffee kissed showstopper.
Equipment
What you will need
- 9 inch tart pan with removable bottom
- Mixing bowls, at least two
- Hand mixer or stand mixer
- Rubber spatula and small offset spatula
- Measuring cups and spoons
- Fine mesh sieve for dusting cocoa
- Pastry brush for espresso
- Microplane or peeler for chocolate shavings
Nothing fancy is required, but the removable bottom pan makes serving super clean. If your kitchen runs warm, chill your bowl and beaters for 10 minutes before whipping cream. It keeps everything light and stable, which is the secret behind the Delicious Tiramisu Tart Recipe for Sweet Moments turning out so beautifully every time.
Want a simple sip to serve alongside? A cold, creamy drink pairs well. Try this refreshing easy banana smoothie to round things out.
Tips for Making the Perfect Tiramisu Tart
Keep it cold. Chill the mascarpone and cream until very cold. Cold dairy whips better, holds its shape longer, and slices cleanly.
Soft peaks are key. Stop when the cream just holds its shape on the whisk. Soft peaks blend smoothly with mascarpone and prevent a stiff or grainy texture.
Don’t flood the crust. Espresso is essential for flavor but too much can create a soggy base. Brush just enough to scent and lightly moisten.
Chill for structure. Four hours is the minimum. Overnight gives the best set and flavors marry beautifully. This is the secret to those tidy bakery style slices.
Use good cocoa. A quality unsweetened cocoa gives that classic tiramisu finish. Dutch process creates a deep, smooth chocolate note that plays perfectly with the coffee.
Slice like a pro. Warm a thin knife under hot water, wipe dry, then slice. Clean and repeat between cuts for picture worthy edges.
Make ahead and storage
The tart can be made 24 hours in advance, covered and chilled. Add cocoa right before serving to keep it crisp looking. Leftovers keep 2 to 3 days in the fridge. For a longer hold, freeze slices on a tray, then wrap individually so you can pull a treat whenever you need it. The Delicious Tiramisu Tart Recipe for Sweet Moments still tastes amazing even after freezing, though the cocoa finish may darken slightly.
“I made this for date night and it was the only dessert we talked about all weekend. Creamy, light, and not too sweet. My partner asked me to put it on repeat.”
Craving another cozy bake for your dessert rotation? You might also enjoy my classic old fashioned lemon pound cake for a bright, buttery contrast.
Variations on the Tiramisu Tart
Chocolate hazelnut: Swirl 2 to 3 tablespoons chocolate hazelnut spread into the mascarpone layer and finish with crushed toasted hazelnuts. It adds nutty warmth without overpowering the coffee.
Extra chocolate lover: Add a thin layer of melted dark chocolate over the cooled crust before brushing with espresso. It creates a delicate crackle under the cream.
Berry twist: Layer sliced strawberries or raspberries under the filling for a fresh pop. The tart acidity balances the creamy sweetness nicely.
Kid friendly: Use decaf espresso and skip the liqueur. The flavor stays rich and dessert like, just gentler.
Gluten free: Use gluten free chocolate cookies for the crust. The rest of the recipe stays the same.
Classic zabaglione style: Whisk pasteurized egg yolks with sugar over a simmering water bath until thick and pale, cool, then fold into mascarpone and whipped cream. This gives a gorgeous old school flavor if you feel like going classic.
Related Recipes
If you like this tart’s balance of creamy and bold, you’ll probably enjoy a few of my other favorites. When I want a sunny bake that takes me straight to a happy place, I go for the bright notes in this sour cream lemon pound cake with cherry compote. For a handheld treat that comes together quickly, these apricot and chocolate bars deliver a sweet and fruity hit. And if you’re stocking your dessert table with a classic, this classic old fashioned lemon pound cake never fails. Want to keep things elegant and simple? You’ll love the easy French apple tart too.
Common Questions
How strong should the coffee be? Brew it strong, like you would for espresso. If using regular coffee, make it double strength. You want a bold flavor so it stands out once chilled.
Can I make this without alcohol? Absolutely. Just leave out the rum or liqueur. The espresso alone gives plenty of character.
What if I can’t find mascarpone? Use full fat cream cheese softened to room temp, then beat until very smooth. It’s a bit tangier than mascarpone, but still delicious.
How do I prevent a crumbly crust? Pack the crust firmly and bake to set it. If it still crumbles, add another tablespoon of melted butter next time so it holds together better.
Can I travel with this tart? Yes. Chill overnight, keep it cold with an ice pack during transport, and dust with cocoa right before serving for the freshest look.
Ready to Slice Into Sweet Moments
There you have it, my easy path to a bakery worthy dessert that always gets smiles. The Delicious Tiramisu Tart Recipe for Sweet Moments brings creamy layers, a hint of espresso, and just enough chocolate to make the whole table happy. If you want to explore another take, check out this lovely guide to a Chocolate Tiramisu Tart for even more inspiration. Keep your ingredients cold, give it time to chill, and let the cocoa fall like confetti. I hope your next gathering is full of laughter, seconds, and that comforting clink of dessert forks.
Tiramisu Tart
Ingredients
Method
- Heat the oven to 350°F. Mix cookie crumbs, melted butter, and salt until evenly moistened. Press into a 9 inch tart pan with a removable bottom.
- Bake for 8 to 10 minutes, just to set. Cool completely.
- Stir espresso with liqueur if using. Lightly brush or spoon a thin layer over the crust. It should be damp, not drenched.
- Whip the cold heavy cream to soft peaks. Stop as soon as the whisk lines stay visible.
- In another bowl, beat mascarpone with powdered sugar, vanilla, and salt until smooth and fluffy.
- Fold the whipped cream into the mascarpone gently until it’s thick and cloud-like.
- Spread into the cooled crust and smooth the top with an offset spatula.
- Chill at least 4 hours or overnight. Right before serving, sift a generous layer of cocoa on top and finish with chocolate shavings if you like.