INTRODUCTION
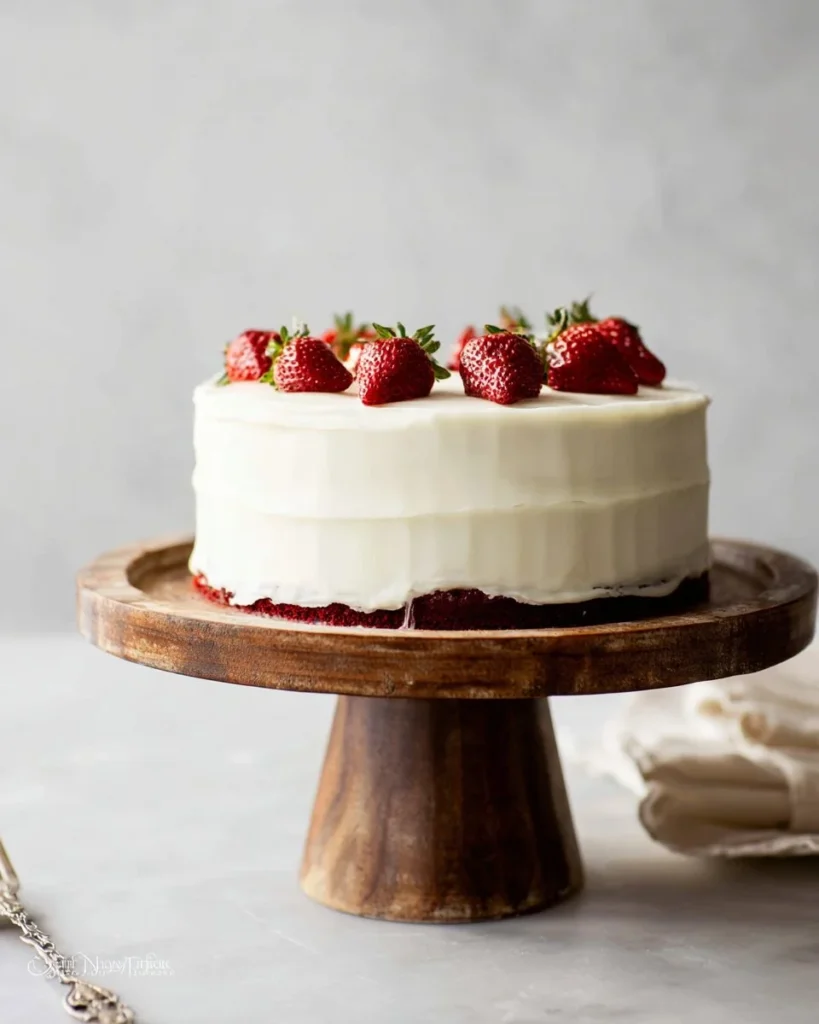
Red Velvet Cake is a timeless classic known for its vibrant color and rich flavor. This dessert is perfect for celebrations like birthdays, weddings, and holidays. With its layers of fluffy cake and creamy frosting, it looks beautiful on any table. The combination of cocoa and buttermilk gives the cake a unique taste, while the cream cheese frosting adds a smooth, tangy touch. If you want to impress family and friends with a stunning dessert, this red velvet cake is a great choice.
WHY YOU WILL LOVE THIS RECIPE
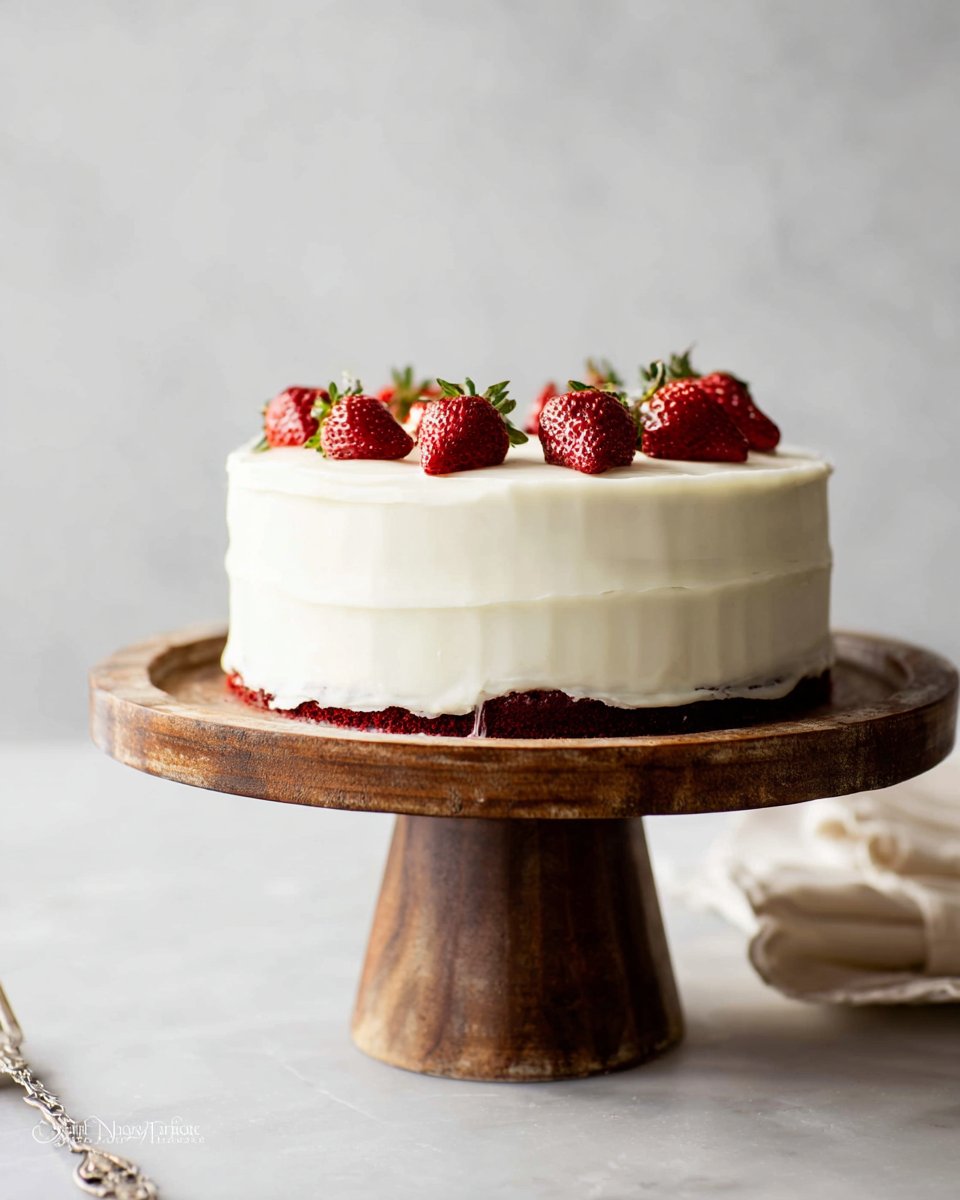
There are many reasons to love this Red Velvet Cake with Cream Cheese Frosting. Firstly, its striking red color makes it visually appealing. This cake is a conversation starter at any gathering. Secondly, the taste is incredible. The cake is soft and buttery, paired perfectly with rich cream cheese frosting. It’s a wonderful mix of sweet and tangy flavors. Thirdly, this cake is not too difficult to make. The recipe has simple ingredients and clear directions, making it accessible for bakers of all levels. Finally, you can customize it to your liking. Whether you prefer a thicker layer of frosting or a lighter chocolate flavor, this recipe allows for variations.
HOW TO MAKE Red Velvet Cake with Cream Cheese Frosting
Creating this delightful Red Velvet Cake with Cream Cheese Frosting involves a few simple steps. The entire process is fun and rewarding, leading to a delicious end product.
EQUIPMENT NEEDED
Before you start baking, gather the following equipment:
- Two 9-inch round cake pans
- Parchment paper
- Mixing bowls (large and medium)
- Handheld or stand mixer
- Rubber spatula
- Whisk
- Measuring cups and spoons
- Serrated knife
- Cake stand or serving plate
- Icing spatula and bench scraper for smoothing frosting
Ingredients You’ll Need:
- 3 cups (360g) cake flour (spooned & leveled)
- 1 teaspoon baking soda
- 2 Tablespoons (10g) unsweetened natural cocoa powder
- 1/2 teaspoon salt
- 1/2 cup (8 Tbsp; 113g) unsalted butter, softened to room temperature
- 2 cups (400g) granulated sugar
- 1 cup (240ml) canola or vegetable oil
- 4 large eggs, room temperature and separated
- 1 Tablespoon pure vanilla extract
- 1 teaspoon distilled white vinegar
- Liquid or gel red food coloring
- 1 cup (240ml) buttermilk, at room temperature
- 16 ounces (452g) full-fat brick cream cheese, softened to room temperature
- 3/4 cup (12 Tbsp; 170g) unsalted butter, softened to room temperature
- 5 cups (600g) confectioners’ sugar
- 1 and 1/2 teaspoons pure vanilla extract
- Pinch of salt, to taste
STEP-BY-STEP INSTRUCTIONS
-
Preheat your oven to 350°F (177°C). Grease two 9-inch cake pans, line with parchment paper, and then grease the parchment paper. This helps the cakes release easily from the pans.
-
In a large bowl, whisk together the cake flour, baking soda, cocoa powder, and salt. Set this mixture aside for later.
-
In another large bowl, use a handheld or stand mixer fitted with a paddle attachment to beat the softened butter and sugar together on medium-high speed until combined, about 1 minute. Scrape the sides and bottom of the bowl with a rubber spatula as needed.
-
Add the oil, egg yolks, vanilla extract, and vinegar. Beat these ingredients on high speed for 2 minutes. Make sure to scrape the bowl again.
-
With the mixer on low speed, add the dry ingredients you prepared earlier in 2-3 additions, alternating with the buttermilk. This means you start with the dry, then add buttermilk, and repeat until everything is mixed.
-
Add your desired amount of red food coloring and mix just until combined. You can use about 1-2 teaspoons of gel food coloring.
-
In a separate bowl, vigorously whisk or beat the 4 reserved egg whites on high speed until stiff peaks form, which takes about 3 minutes. Gently fold the whipped egg whites into the red velvet batter. The result should be a silky, slightly thick batter.
-
Divide the batter evenly between the two prepared cake pans. Bake for 30-32 minutes or until the tops spring back when touched and a toothpick inserted in the center comes out clean. If the cakes seem wet, bake a little longer but avoid overbaking.
-
Remove the cakes from the oven and allow them to cool completely in the pans on a wire rack. Make sure they are completely cool before frosting and assembling.
-
For the cream cheese frosting, beat the softened cream cheese and the remaining unsalted butter together in a large bowl using a mixer on medium-high speed until smooth, about 2 minutes.
-
Gradually add the confectioners’ sugar, vanilla extract, and a pinch of salt. Start mixing on low speed for 30 seconds, then increase to high speed and beat for 3 minutes until creamy and fully combined. If the frosting seems too thin, add more sugar; if it’s too sweet, add a pinch of salt.
-
To assemble, use a serrated knife to slice a thin layer off the tops of the cakes to create a flat surface. Discard the crumbs or save them for decoration.
-
Place one cake layer on your cake stand or serving plate and evenly cover the top with frosting. Place the second layer on top and spread the remaining frosting over the top and sides. Use an icing spatula and a bench scraper for smoother frosting.
-
Refrigerate the cake for at least 30-60 minutes before slicing. This helps the cake keep its shape when cutting.
-
Store any leftover cake tightly covered in the refrigerator for up to 5 days. You can also freeze the frosted cake or unfrosted layers for up to 2-3 months. Thaw overnight in the refrigerator before serving.

HOW TO SERVE Red Velvet Cake with Cream Cheese Frosting
Serve this beautiful Red Velvet Cake with Cream Cheese Frosting as a delightful dessert at any gathering. It pairs wonderfully with a cup of coffee or tea, making it perfect for afternoon breaks. You can slice the cake into generous pieces and serve it plain, or add fresh berries on the side for a touch of color and sweetness. A scoop of vanilla ice cream can also take this cake to the next level. If you’re celebrating a special occasion, garnishing the top with decorative piping or sprinkles adds an elegant touch.
STORAGE & FREEZING : Red Velvet Cake with Cream Cheese Frosting
For storage, cover leftover cake tightly with plastic wrap or aluminum foil and keep it in the refrigerator. It will stay fresh for about 5 days. If you want to save cake layers for later, unfrosted layers can be wrapped in plastic wrap and frozen for up to 2-3 months. When you’re ready to enjoy the frozen layers, allow them to thaw overnight in the refrigerator. For frosted cake, it is best to freeze it unfrosted to maintain its quality.
SERVING SUGGESTIONS
When serving your Red Velvet Cake, consider complementing it with:
- Berries, such as strawberries or raspberries, for a fresh burst of flavor.
- A scoop of vanilla ice cream to balance the sweetness.
- A drizzle of chocolate or caramel sauce for extra indulgence.
- Whipped cream on the side for added creaminess.
These simple additions can elevate the cake even further, impressing your guests.
VARIATIONS
Feel free to make this Red Velvet Cake your own! Here are some flavorful variations:
- Chocolate Chip Red Velvet Cake: Add semi-sweet chocolate chips to the batter for a delightful chocolate surprise.
- Red Velvet Cupcakes: Instead of baking a cake, use the batter to make cupcakes. They make great individual treats!
- Different Frosting: Try a buttercream or chocolate ganache instead of cream cheese frosting for a different flavor.
- Add Nuts: Incorporate chopped pecans or walnuts in the batter for added texture.
FAQs
-
Can I use a different type of oil?
Yes, you can use vegetable oil, canola oil, or any light-tasting oil. It is best to avoid oils with strong flavors. -
What makes a red velvet cake different from a chocolate cake?
A red velvet cake uses cocoa powder along with buttermilk, giving it a unique texture and flavor. The vibrant red color comes from food coloring. -
Can I leave out the food coloring?
Yes, if you prefer, you can make a chocolate-flavored velvet cake without the red food coloring. The taste will differ, but it still tastes great. -
How do I know when my cake is done baking?
The cake is done when the tops spring back when lightly pressed, and a toothpick inserted into the center comes out clean. -
Can I use a different frosting?
Absolutely! This cake pairs well with buttercream, ganache, or even a whipped cream topping. Feel free to experiment!
MAKE-AHEAD TIPS FOR Red Velvet Cake with Cream Cheese Frosting
You can prepare the components of this Red Velvet Cake ahead of time. Bake the cake layers a day or two in advance and store them tightly wrapped at room temperature. You can also make the cream cheese frosting ahead and store it in the fridge. Just remember to bring it back to room temperature and re-whip it before frosting the cake. This planning can help make your cake-making process more efficient and less stressful. Enjoy your baking experience!
Red Velvet Cake with Cream Cheese Frosting
Ingredients
Method
- Preheat your oven to 350°F (177°C). Grease two 9-inch cake pans, line with parchment paper, and then grease the parchment paper.
- In a large bowl, whisk together the cake flour, baking soda, cocoa powder, and salt. Set this mixture aside.
- In another large bowl, beat the butter and sugar together on medium-high speed until combined, about 1 minute.
- Add the oil, egg yolks, vanilla extract, and vinegar. Beat these ingredients on high speed for 2 minutes.
- With the mixer on low speed, add the dry ingredients in 2-3 additions, alternating with the buttermilk.
- Add your desired amount of red food coloring and mix just until combined.
- In a separate bowl, vigorously beat the egg whites on high speed until stiff peaks form, about 3 minutes. Gently fold the whites into the batter.
- Divide the batter evenly between the prepared cake pans. Bake for 30-32 minutes or until a toothpick inserted comes out clean.
- Remove the cakes from the oven and allow them to cool completely in the pans on a wire rack.
- Beat the softened cream cheese and the remaining unsalted butter together until smooth, about 2 minutes.
- Gradually add the confectioners’ sugar, vanilla extract, and a pinch of salt. Mix on low speed for 30 seconds, then beat on high for 3 minutes.
- Slice a thin layer off the tops of the cakes to create a flat surface.
- Cover one cake layer with frosting, place the second layer on top, and spread the remaining frosting over the top and sides.
- Refrigerate the cake for at least 30-60 minutes before slicing.