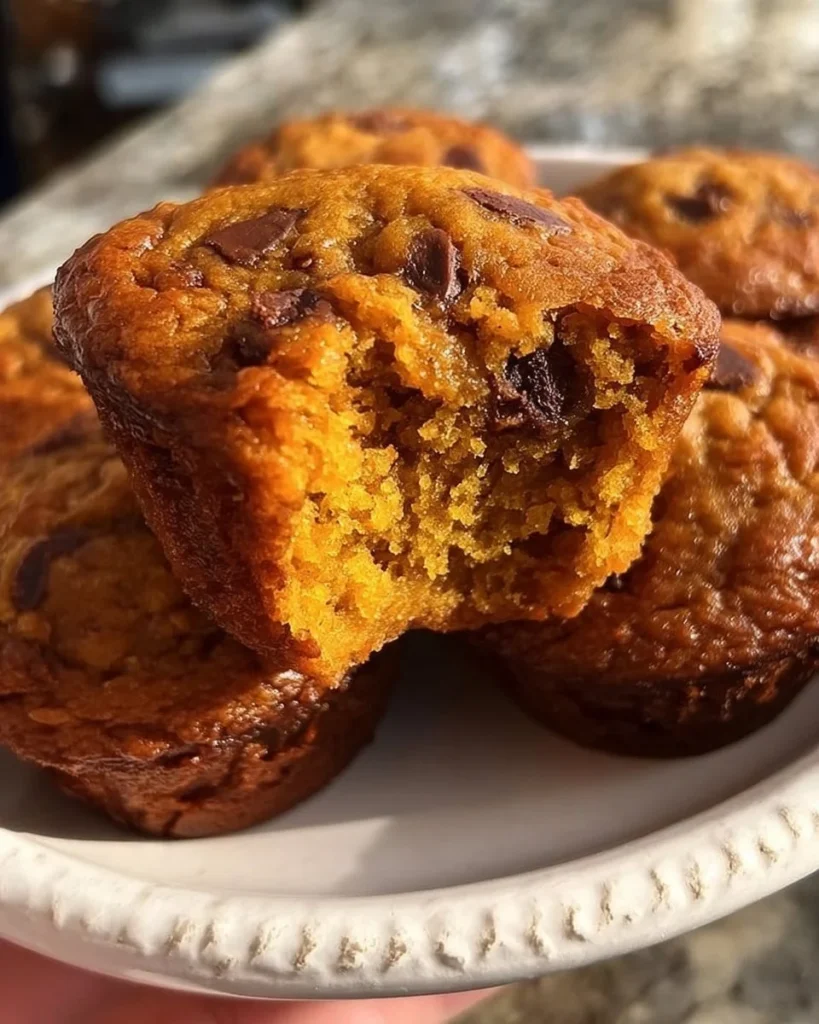
Fall is a wonderful time to enjoy delicious flavors and cozy treats. One of the best ways to celebrate the season is by making gluten-free pumpkin muffins. These muffins are not just tasty; they are also easy to make. This article will guide you through everything you need to know about making these sweet, spiced wonders. Whether you’re gluten-sensitive or just love the taste of pumpkin, these muffins will satisfy your cravings and warm your heart.
WHY YOU WILL LOVE THIS RECIPE
There are many reasons to love gluten-free pumpkin muffins. First, they are moist and fluffy, making them a perfect snack or breakfast treat. The pumpkin puree adds a rich flavor and a lovely texture, while the spices bring warmth and coziness. Using coconut sugar keeps them sweet without being overly sugary. Plus, they are gluten-free, so everyone can enjoy them.
Another great thing about this recipe is its simplicity. With just a few ingredients, you can whip up a batch quickly. These muffins are also very forgiving. Even if you’re new to baking, you will find success with this recipe. The muffins are perfect for sharing with family and friends or keeping for yourself to enjoy throughout the week.
HOW TO MAKE Gluten Free Pumpkin Muffins
Making gluten-free pumpkin muffins is simple and fun. Follow the steps below, and you will have a delightful batch in no time.
Ingredients
- 1 can pumpkin puree
- 1 cup coconut sugar
- 2 cups gluten-free flour
- 1 teaspoon baking soda
- 1 teaspoon baking powder
- 1 teaspoon cinnamon
- 1/2 teaspoon nutmeg
- 1/2 teaspoon salt
- 3 large eggs
- 1/2 cup almond milk
- 1/4 cup coconut oil
STEP-BY-STEP INSTRUCTIONS
- Preheat the oven to 350°F (175°C) and line a muffin tin with paper liners.
- In a large bowl, mix the pumpkin puree and coconut sugar until well combined.
- In a separate bowl, whisk together the gluten-free flour, baking soda, baking powder, cinnamon, nutmeg, and salt.
- Add the dry ingredients to the pumpkin mixture and mix until just combined.
- In another bowl, beat the eggs, almond milk, and melted coconut oil together.
- Pour the wet mixture into the pumpkin mixture and stir until smooth.
- Fill each muffin cup about 2/3 full with batter.
- Bake for 20-25 minutes, or until a toothpick inserted in the center comes out clean.
- Allow to cool for a few minutes before transferring to a wire rack.

HOW TO SERVE Gluten Free Pumpkin Muffins
Once your gluten-free pumpkin muffins have cooled, it’s time to serve them! You can enjoy them warm or at room temperature. They are great on their own but are also good with a pat of butter or a drizzle of maple syrup. Pair them with a cup of coffee or tea for a lovely afternoon snack or breakfast option.
STORAGE & FREEZING : Gluten Free Pumpkin Muffins
If you have leftovers, don’t worry! These muffins store well. Place them in an airtight container at room temperature for up to 3 days. If you want to keep them longer, you can freeze them. Wrap each muffin tightly in plastic wrap and place them in a freezer bag. They will stay fresh in the freezer for up to 3 months. When you’re ready to enjoy them, just thaw them at room temperature or pop them in the microwave for a few seconds.
SERVING SUGGESTIONS
Gluten-free pumpkin muffins are very versatile. Here are some serving suggestions to enhance your muffin experience:
- Breakfast: Enjoy them with yogurt and fresh fruit on the side.
- Snack: Pack them in lunch boxes or take them on road trips for a healthy treat.
- Dessert: Top them with whipped cream or serve with ice cream for a sweet treat.
- Brunch: Serve them with a spread of cheese and jams for a delicious brunch option.
VARIATIONS
Feel free to get creative with your muffins! Here are some fun variations to try:
- Chocolate Chip Pumpkin Muffins: Fold in a cup of dairy-free chocolate chips for a sweet treat.
- Nutty Pumpkin Muffins: Add chopped nuts such as walnuts or pecans for extra crunch.
- Cranberry Pumpkin Muffins: Mix in dried cranberries for a tart contrast to the sweetness.
- Spiced Pumpkin Muffins: Experiment by adding other spices like ginger or cloves for a different flavor profile.
FAQs
1. Can I use regular flour instead of gluten-free flour?
No, this recipe is designed to be gluten-free. Regular flour will not work well and could cause issues for those who cannot have gluten.
2. Can I substitute pumpkin puree with fresh pumpkin?
Yes, you can use fresh pumpkin. Just make sure to cook and puree it until smooth before using it in the recipe.
3. What can I replace coconut sugar with?
If you don’t have coconut sugar, you can use brown sugar or cane sugar as a substitute. The flavor may change slightly, but it will still taste good.
4. How long will these muffins last?
Stored in an airtight container at room temperature, they will last for about 3 days. If frozen, they can last up to 3 months.
MAKE-AHEAD TIPS FOR Gluten Free Pumpkin Muffins
If you want to make these muffins ahead of time, here are some tips:
- Prep Ingredients: Measure and prepare the dry ingredients in advance. Store them in an airtight container until you’re ready to bake.
- Freezer Option: Bake the muffins ahead and freeze them. Thaw them when you need a quick snack or breakfast option.
- Muffin Mix: You can mix the dry ingredients and store them in a bag. When you want to bake, just add the wet ingredients and bake as directed.
With these simple steps and tips, you can enjoy delicious gluten-free pumpkin muffins anytime. Whether it’s for yourself or for sharing, this recipe brings joy and warmth to your kitchen. Happy baking!
Gluten-Free Pumpkin Muffins
Ingredients
Method
- Preheat the oven to 350°F (175°C) and line a muffin tin with paper liners.
- In a large bowl, mix the pumpkin puree and coconut sugar until well combined.
- In a separate bowl, whisk together the gluten-free flour, baking soda, baking powder, cinnamon, nutmeg, and salt.
- Add the dry ingredients to the pumpkin mixture and mix until just combined.
- In another bowl, beat the eggs, almond milk, and melted coconut oil together.
- Pour the wet mixture into the pumpkin mixture and stir until smooth.
- Fill each muffin cup about 2/3 full with batter.
- Bake for 20-25 minutes, or until a toothpick inserted in the center comes out clean.
- Allow to cool for a few minutes before transferring to a wire rack.