WHY MAKE THIS RECIPE
Making Easy Homemade Dilly Beans with Vinegar & Pickling Spice is a great way to enjoy the fresh taste of green beans. Not only are they crunchy and flavorful, but they also add a zesty and tangy touch to meals. By making them at home, you know exactly what ingredients are used, and you can adjust the flavors to your liking. These dilly beans are perfect for snacking, adding to salads, or serving as a side dish. They are easy to prepare and can be stored for later use, making them a convenient option for busy days.
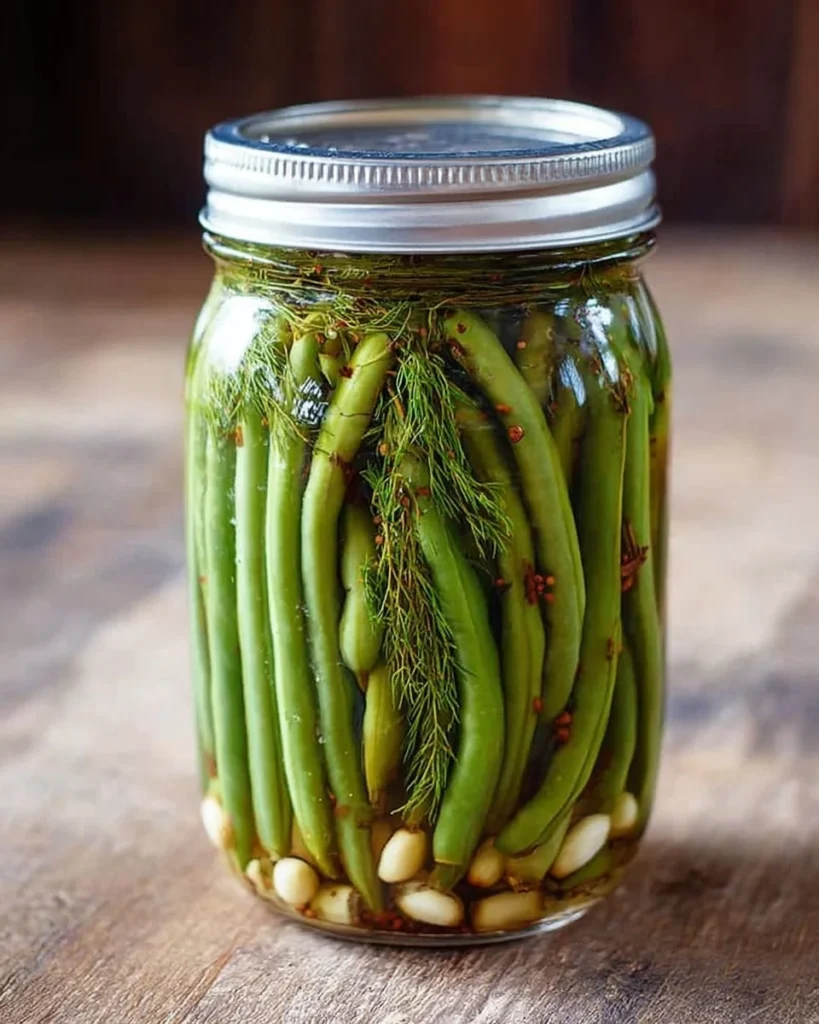
HOW TO MAKE Easy Homemade Dilly Beans with Vinegar & Pickling Spice
Ingredients
- 2 lbs fresh green beans (trimmed, choose crisp, straight beans about 4–5″ long)
- 4 cups water
- 3 cups white vinegar (5% acidity)
- 1/4 cup pickling salt or kosher salt (no iodine)
- 4 cloves garlic (peeled and slightly crushed)
- 1 tablespoon pickling spice (blend with mustard seeds, peppercorns, coriander, bay leaf)
- 4 sprigs fresh dill (about 2–3″ each)
- 1 teaspoon red pepper flakes (optional, for Spicy Dilly Beans)
- ½ teaspoon black peppercorns
DIRECTIONS
Prep the Beans & Jars
Start by washing the green beans thoroughly. Trim both ends to ensure they fit nicely in your jars. Next, clean your canning jars and lids. You can do this by placing them in hot, soapy water or running them through a dishwasher cycle. Having clean jars is important to keep your dilly beans safe.
Pack the Jars
Once your jars are clean and ready, pack them with the green beans. Stand the green beans upright in the jars. You want to fit them in tightly but don’t crush them. Add in the garlic, fresh dill, and any optional red pepper flakes you may want for extra heat.
Make the Brine
In a medium-sized pot, combine the water, white vinegar, and pickling salt. Bring this mixture to a boil over medium heat. Stir it occasionally to ensure that the salt dissolves completely. Once it reaches a boil, take it off the heat.
Fill & Remove Air Bubbles
Carefully pour the hot brine over the packed green beans in the jars. Fill each jar, leaving about a half-inch of space at the top. After this, use a clean utensil or a bubble remover to gently press down into the jars to release any trapped air bubbles. Ensure the beans are fully submerged in the brine.
Process in Canner
Now, you need to can the jars to preserve your dilly beans. Place the lids on the jars and secure them without over-tightening. Place the jars in a large pot or canner filled with boiling water. Make sure the jars are covered by at least 1-2 inches of boiling water. Process the jars for about 10-15 minutes. Once done, carefully remove them and let them cool on a clean towel or wire rack.
Wait & Enjoy
After cooling, check that the jar lids have sealed properly. The center of the lid should be pushed down and should not pop up when pressed. If they are sealed, store the jars in a cool, dark place. Wait at least a week for the flavors to develop before enjoying your homemade dilly beans.
HOW TO SERVE Easy Homemade Dilly Beans
Dilly beans are versatile and can be enjoyed in many ways. They make a great snack straight from the jar or can be added to cheese and charcuterie boards for some crunch and flavor. You can also chop them up and toss them in salads for an added zing. Try them as a side to grilled meats or as a topping for burgers and sandwiches. Their tangy flavor pairs well with many dishes, making them a great addition to your meals.
HOW TO STORE Easy Homemade Dilly Beans
Store your homemade dilly beans in a cool, dark area like a pantry or cupboard. They can last for about 1 year when stored properly. Once opened, keep the jars in the fridge and consume them within a couple of weeks. Always use clean utensils when serving to avoid contamination, which can spoil your beans.
TIPS TO MAKE Easy Homemade Dilly Beans
-
Choose Fresh Ingredients: Always use the freshest and crispest green beans, as this will enhance the taste and texture of your dilly beans.
-
Adjusting Spices: Feel free to tailor the spices according to your taste. You can add more garlic, increase the red pepper flakes for spicier beans, or experiment with additional herbs.
-
Seal Properly: Make sure the jars are sealed correctly to prevent spoilage. Check that the lid is concave and snap back into place when pressed.
-
Experiment with Different Vinegars: Although white vinegar is common, you can also try apple cider vinegar or red wine vinegar for a different flavor profile.
VARIATIONS
Dilly beans can be customized to suit your taste preferences. Here are a few variations:
-
Spicy Dilly Beans: Include additional red pepper flakes or even sliced jalapeños for an extra kick.
-
Sweet Dilly Beans: Add a bit of sugar or sweetener to the brine for a hint of sweetness to balance the tartness.
-
Herb-Infused Dilly Beans: Try incorporating other herbs like thyme or oregano along with the dill for a different flavor.
-
Mixed Vegetable Dilly Jars: Add sliced carrots, cauliflower, or even small cucumbers for a mixed pickled veggie jar.
FAQs
1. How long do dilly beans need to sit before they are ready to eat?
It’s best to wait at least a week after canning for the flavors to develop fully. They can be eaten sooner but might taste a bit less flavorful.
2. Can I use frozen green beans for this recipe?
It is recommended to use fresh green beans for the best crunch and flavor. Frozen beans may become mushy during the pickling process.
3. What if I don’t have pickling spice?
If you don’t have pickling spice, you can create your own by mixing equal parts of mustard seeds, peppercorns, coriander seeds, and adding a bay leaf. You can also purchase ready-made pickling spice at the store.
4. Are dilly beans safe to make at home?
Yes, as long as you follow proper canning procedures and ensure your jars are sealed correctly, homemade dilly beans are safe to enjoy.
By following this simple recipe, you can make easy and delicious homemade dilly beans that everyone will love. Enjoy your crunchy, tangy treat!