The Best Honey White Bread
INTRODUCTION
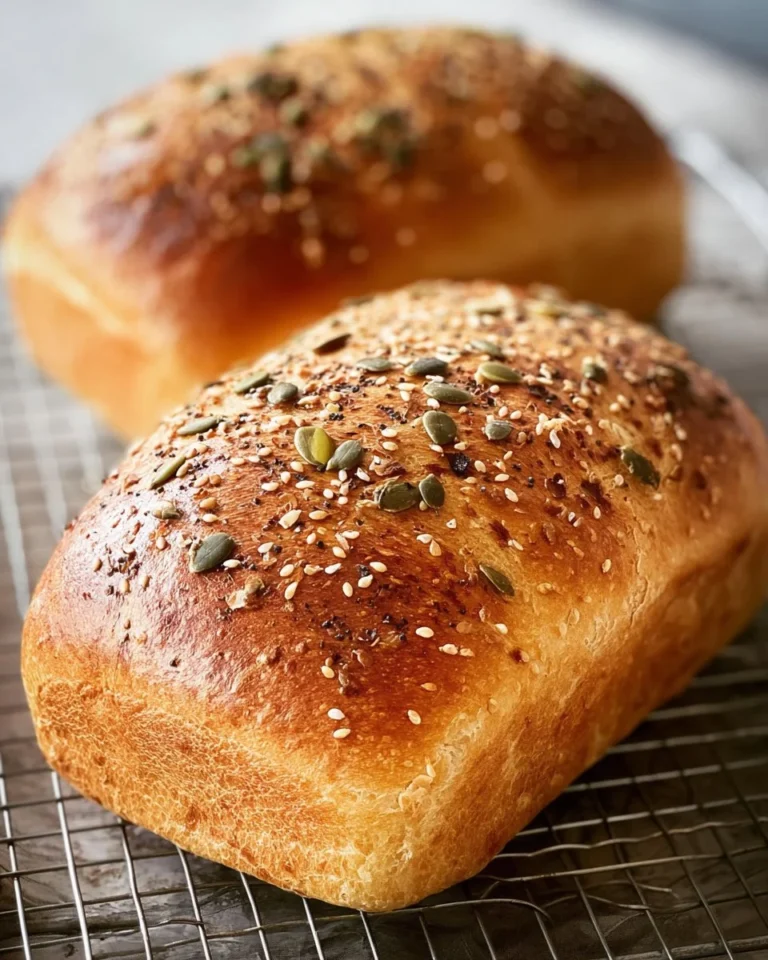
Honey white bread is soft, warm, and lightly sweet. This recipe makes two full loaves with a golden crust and a tender crumb. It is easy to make and works well for daily meals, sandwiches, and toast. If you like easy weekend baking, you might also enjoy a sweet breakfast like cinnamon roll pancakes as a weekend treat. This bread is a great base for healthy meals and can be changed to fit a lighter option or a high protein meal with a few swaps.
WHY YOU WILL LOVE THIS RECIPE
You will love this honey white bread because it is soft, reliable, and simple to make. It is a great choice for meal prep because you can slice ahead and store for the week. With small changes, this can be a healthy version of white bread that adds fiber and protein. It also works well as a lighter option to store-bought loaves that may have extra preservatives and unknown fats. This bread is good for weight loss when eaten in controlled portions and paired with lean proteins and vegetables.
HOW TO MAKE The Best Honey White Bread
This section shows how to make the dough, shape the loaves, and bake them for a soft crumb and shiny top. The full ingredient list and step-by-step instructions are below. Follow the times and temperatures for best results. Small changes in flour or add-ins can turn this into a healthier or higher-protein loaf.
EQUIPMENT NEEDED
- Stand mixer with dough hook (or a large bowl and strong hands)
- Measuring cups and spoons
- 9×5 inch loaf pans (two)
- Plastic wrap and a clean towel
- Pastry mat or clean counter for shaping
- Instant-read thermometer (recommended)
- Pastry brush for egg wash and melted butter
Ingredients You’ll Need :
2 cups warm milk ((about 110-115 degrees)), 1 Tbsp instant yeast, 1 tsp sugar, 5.5 to 6.5 cups bread flour ((can substitute AP flour or do half of each)), 1/4 cup melted butter ((1/2 stick)), 1/4 cup honey, 1 egg, slightly beaten, 1 Tbsp salt, Egg wash: 1 egg whisked with 1 Tbsp water, Additional melted butter to brush on when it comes out of the oven
STEP-BY-STEP INSTRUCTIONS :
Put the warm milk in your mixer bowl and sprinkle the yeast and sugar over it. Mix together and let sit for 5 minutes to make sure the yeast activates and gets foamy.
Add 5-1/2 cups of the flour, the melted butter, honey, egg and salt.
Use the dough hook attachment to mix the dough together on low speed.
Add small amounts of bread flour, (up to another cup total but you do NOT have to use the whole cup), just until the dough is the right consistency, (you want a soft dough that is easy to work with, and you want it to feel tacky, but not stick to your fingers.).
Let the mixer knead the bread on low speed (2 on my KitchenAid) for 5 minutes.
Scrape the dough in to a ball, place in a large oiled bowl, cover the bowl with plastic wrap and a clean towel and set in a warm place to rise for 1 hour or until it has doubled in size. (I turn the oven on at the lowest temperature for just 1 minute, then turn it off and put the mixing bowl in there.).
Lightly grease two loaf pans with non-stick spray. (I use 9×5.)
Once the dough has risen, punch it down with your fist, then turn out on to a lightly floured pastry mat or counter. Divide the dough in two equal portions – shape in to a ball.
Press or roll the dough out in to a rectangle, fold down a third of the dough from the shorter end and press it down with the heel of your hand. Continue to fold and press until you have a roll – tuck in the ends, and place the bread with seams down in the prepared bread pan. Repeat with the other piece of dough.
Cover the pans lightly with plastic wrap and let the loaves rise another 30 minutes in a warm place.
When ready to bake, preheat oven to 350.
Remove plastic wrap, brush the loaves gently with egg wash, then bake the loaves at 350 for about 30 minutes. (Bread should register 190 degrees with an instant read thermometer to be fully baked, but not overbaked.
Remove from the oven and let cool 5 minutes in the pans before popping the loaves out of the pans on to a cooling rack and brushing with melted butter.
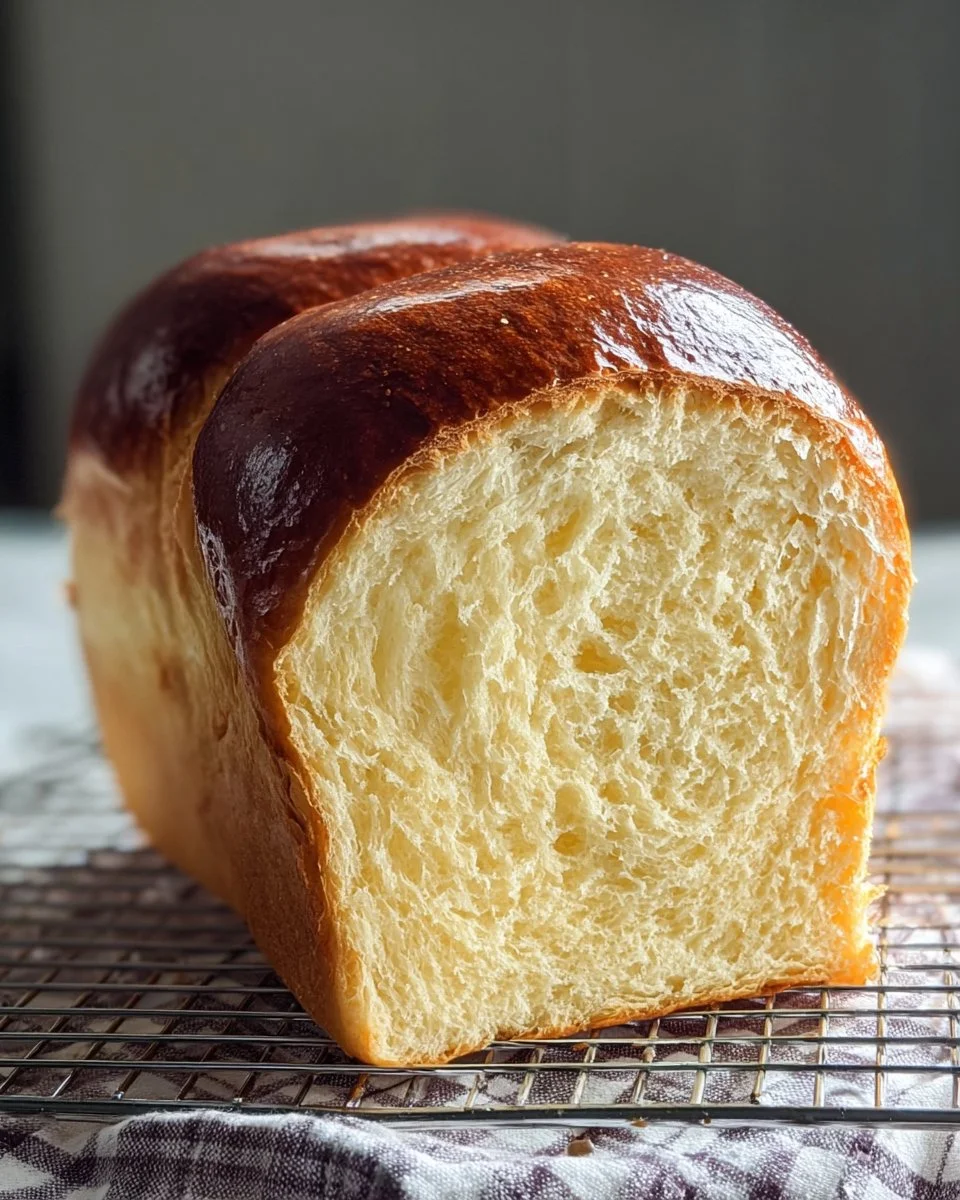
Cool the bread for at least 30 minutes before slicing!

HOW TO SERVE The Best Honey White Bread
Serve slices plain, toasted, or with light toppings. For a balanced meal, pair one slice with scrambled egg whites, fresh fruit, and a side salad. For sandwiches, use lean turkey, lots of greens, and mustard instead of mayo to keep it lighter. Portion control helps if you watch calories: one medium slice (about 1 oz to 1.5 oz) is a good serving size. This bread is great for meal prep when you slice ahead and store slices in the fridge or freezer for quick use. For weekend brunch, a small plate with two slices, a cup of low-fat yogurt, and berries makes a filling, balanced meal — not just carbs.
You can pair the bread with warm, savory dishes too. Serve it with a saucy pasta or a slow-cooked chicken for a simple dinner. If you like bold flavors, a bowl of garlic soup and a slice of this bread is comforting and simple. For a different weekend menu, try it alongside your favorite hot breakfast or a recipe like crockpot garlic parmesan chicken pasta to soak up the sauce.
STORAGE & FREEZING : The Best Honey White Bread
Store cooled loaves wrapped in plastic wrap or in a bread box at room temperature for up to 3 days. For longer storage, slice and place in freezer bags with the air pressed out. Frozen slices will keep well for up to 3 months. To thaw, leave slices at room temperature for 15–20 minutes, or toast directly from frozen for a quick snack. For best texture, refresh slices in a toaster or a 300°F oven for a few minutes. Proper storage makes this bread a smart option for meal prep and family lunches.
SERVING SUGGESTIONS
- Light breakfast: one slice, low-fat cottage cheese, and fresh berries.
- Healthy sandwich: turkey, spinach, tomato, and hummus on two thin slices.
- Balanced side: pair a slice with a cup of vegetable soup and a small portion of grilled chicken.
- Snack: one toasted slice with a thin spread of natural peanut butter and banana slices for added protein and fiber.
These ideas help keep meals balanced and can support weight loss goals when you watch portion sizes.
VARIATIONS
Healthier version:
- Replace half the bread flour with whole wheat flour for more fiber. Reduce liquid slightly if dough feels too wet. This adds fiber and makes a more filling slice, which can be a lighter option for daily meals.
High-protein or low-carb version:
- Add 1/2 to 3/4 cup unflavored whey protein isolate or vital wheat gluten and reduce flour by the same amount to boost protein, making it a better choice for a high protein meal. For a lower-carb take, make smaller rolls and limit serving size, or try a recipe that uses almond flour and eggs for a low carb bread alternative (this is a different recipe style and will change texture).
Diabetic-friendly or low sugar version:
- Cut the honey to 2 Tbsp and use a yeast-friendly sugar substitute for the 1 tsp sugar if you need lower sugars. Keep in mind texture and browning may change slightly. Always check blood sugar responses when changing carbs for diabetes.
Air fryer or oven-baked version:
- For small loaves or rolls, shape smaller pieces and bake in an air fryer at 325°F for 10–15 minutes until golden and cooked through. This makes quick, fresh rolls and is handy when you want small portions cooked fast. For full loaves, use the oven method above for even baking.
Gluten-free version:
- Swap the flour for a gluten-free all-purpose flour blend that contains xanthan gum, and reduce the liquid slightly. Texture will differ, but you can still enjoy a honey-flavored, gluten-free loaf.
FAQs
Q: Is this bread healthy?
A: It can be a healthy version if you use whole wheat flour for half the flour, reduce the butter slightly, and keep portions in check. Whole grains add fiber and slow digestion.
Q: Can people with diabetes eat this bread?
A: With adjustments it can be more diabetic-friendly. Use less honey, swap sugar for a suitable substitute, and monitor portion size. Talk to your healthcare provider for personalized advice.
Q: How long does the bread last in the fridge?
A: In the fridge, wrapped well, it lasts 4–7 days but may dry out. Freezing is better for long storage.
Q: Can I add seeds or nuts for more protein and fiber?
A: Yes. Add 1/4 to 1/2 cup of seeds like flax, chia, or chopped nuts to the dough for extra fiber and protein. This is a simple way to make a more filling, high protein meal option.
Q: Can I use all-purpose flour?
A: Yes. You can use AP flour or a mix of AP and bread flour. The crumb may be slightly less chewy with AP flour. Use up to 6.5 cups total if needed.
Q: Can I make rolls instead of loaves?
A: Yes. Shape smaller pieces and bake at a similar temperature for less time. Air fryer baking works well for small rolls and faster cooking.
MAKE-AHEAD TIPS FOR The Best Honey White Bread
Make the dough the night before and let it rise slowly in the fridge for a flavor boost. In the morning, shape, let rise 30 minutes, and bake. This is great for meal prep and saves time on busy days. Slice the loaf right after it cools and store slices in the fridge or freezer so you can grab bread for sandwiches, toast, or snacks. For busy weeks, keep slices in the freezer and toast as needed — this keeps bread fresh and helps control portions. If you like sweet breakfast ideas, pairing toasted slices with a quick recipe like cinnamon roll pancakes can turn meal prep into a weekend treat that feels special but stays simple.

Honey White Bread
Ingredients
Method
- Put the warm milk in your mixer bowl and sprinkle the yeast and sugar over it. Mix together and let sit for 5 minutes to make sure the yeast activates and gets foamy.
- Add 5-1/2 cups of the flour, the melted butter, honey, egg and salt.
- Use the dough hook attachment to mix the dough together on low speed.
- Add small amounts of bread flour, just until the dough is the right consistency, until you have a soft and tacky dough.
- Let the mixer knead the bread on low speed for 5 minutes.
- Scrape the dough into a ball, place in a large oiled bowl, cover the bowl with plastic wrap and a clean towel and set in a warm place to rise for 1 hour or until doubled in size.
- Lightly grease two 9×5 loaf pans with non-stick spray.
- Once the dough has risen, punch it down and turn it out onto a lightly floured surface. Divide the dough in two equal portions and shape into balls.
- Press or roll the dough out into a rectangle, fold down a third from the shorter end and press down. Continue to fold and press until you have a roll, tuck in the ends, and place seam side down in the prepared pans.
- Cover the pans lightly with plastic wrap and let the loaves rise for another 30 minutes in a warm place.
- Preheat oven to 350°F.
- Remove plastic wrap, brush the loaves gently with egg wash, then bake at 350 for about 30 minutes.
- Check that the bread registers 190 degrees with an instant read thermometer to ensure it's fully baked.
- Remove from the oven and let cool for 5 minutes in the pans before turning out onto a cooling rack and brushing with melted butter.
- Cool the bread for at least 30 minutes before slicing.