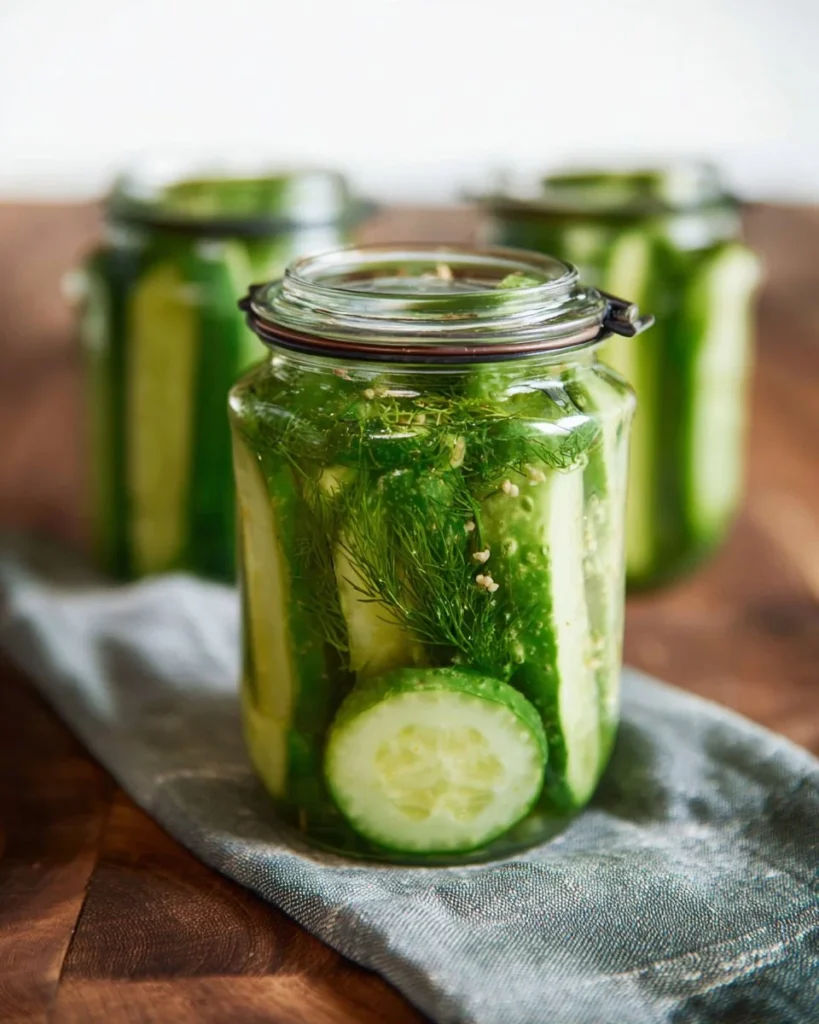
WHY MAKE THIS RECIPE
Easy Refrigerator Dill Pickles are a fantastic addition to your meals. They add a crunch and a burst of flavor, making everything from sandwiches to salads more exciting. The best part about this recipe is that it is quick and straightforward. You don’t need to worry about canning techniques or complicated processes. These pickles come together in just a few simple steps, and you can enjoy them within a day or two. Plus, they only use a handful of ingredients that you probably already have at home.
Making pickles at home also means you can control the flavors. You can adjust the amount of garlic, dill, or even add spices according to your taste. This flexibility makes homemade pickles far more enjoyable compared to store-bought options.
Eating pickles is not just tasty; they are also good for the gut! Fermented foods like dill pickles can aid in digestion due to the probiotics they contain. So, not only can you add some zing to your meals, but you can also enjoy some health benefits at the same time.
HOW TO MAKE Easy Refrigerator Dill Pickles
Ingredients:
- 6-8 small cucumbers
- 1 cup white vinegar
- 1 cup water
- 1 tbsp salt (pickling or kosher salt)
- 1 tbsp sugar (optional)
- 4 cloves garlic (peeled and halved)
- 4-6 fresh dill sprigs
DIRECTIONS:
Prepare the cucumbers: Start by washing the cucumbers thoroughly under running water. You can slice them into rounds or spears, or if they are small enough, leave them whole. The choice is yours on how you want them to be cut!
Prepare the jars: Take clean jars and place 2-4 cloves of garlic and 2-3 fresh dill sprigs at the bottom. This will give extra flavor to your pickles.
Pack the cucumbers: Now, pack the cucumber slices or spears tightly into the jars. Make sure to leave a little bit of space at the top of the jars so there is room for the brine.
Make the brine: In a small saucepan, combine the vinegar, water, salt, and sugar (if using). Heat the mixture until it reaches a boil, and stir it well to dissolve the salt and sugar completely.
Add the brine to the jars: Carefully pour the hot brine over the cucumbers in the jars. Make sure the cucumbers are completely covered with liquid, but leave about 1/2 inch of headspace at the top of the jars. Add any remaining dill sprigs on top.
Seal and cool: Let the jars sit and cool down to room temperature. Once they have cooled off, put the lids on the jars and place them in the refrigerator.
Marinate: To develop the best flavor, let the pickles marinate in the refrigerator for at least 24 hours before eating. However, they will taste even better if you wait a few days. You can store them in the fridge for up to 1-2 months.
HOW TO SERVE Easy Refrigerator Dill Pickles
Easy Refrigerator Dill Pickles are incredibly versatile when it comes to serving. You can eat them straight from the jar as a snack or use them to elevate any meal. They make an excellent topping for burgers, sandwiches, and salads. You can also chop them up and include them in potato salad, coleslaw, or tuna salad for an extra crunch and flavor.
Do not forget that they’re great side dishes as well! Pair them with grilled meats or use them to complement a charcuterie board. Their tangy flavor contrasts well with creamy cheeses and savory meats.
If you’re hosting a gathering, having a small bowl of these pickles on the table can be a great conversation starter, bringing added flavor and freshness to the meal.
HOW TO STORE Easy Refrigerator Dill Pickles
Storing your Easy Refrigerator Dill Pickles is simple. Just keep them in the refrigerator, and make sure the jars are sealed tightly. They will last for about 1-2 months, which is more than enough time for you to enjoy them!
If you find that you’re not eating them as quickly as you thought, make sure to check the pickles occasionally. Look for any signs of spoilage, like an off smell or changes in color. If you see anything unusual, it’s better to be safe and dispose of them.
When storing, always use clean utensils to avoid introducing bacteria that could spoil your pickles. This will help maximize their shelf life and keep them fresh longer.
TIPS TO MAKE Easy Refrigerator Dill Pickles
-
Choose fresh cucumbers: The fresher the cucumbers, the crunchier the pickles will be. Look for firm cucumbers without blemishes.
-
Adjust the flavors: Feel free to modify the garlic or dill according to your personal taste. If you like spicier pickles, you can add crushed red pepper flakes or whole black peppercorns.
-
Use good salt: Always use pickling or kosher salt instead of regular table salt. Table salt can contain additives that may affect the clarity of the brine.
-
Let them sit longer: If you have patience, letting the pickles sit for more than a couple of days will give them an even richer taste. They develop their flavor the longer they marinate in the brine.
-
Experiment: This recipe is a great starting point, but don’t hesitate to add other ingredients like mustard seeds, coriander seeds, or even slices of onions.
VARIATIONS
There are many ways to mix up your Easy Refrigerator Dill Pickles:
- Spicy Dill Pickles: Add crushed red pepper or sliced jalapeños to the jars for a kick.
- Bread and Butter Pickles: Adjust the sugar content and add a bit of onion for that classic sweet pickle taste.
- Garlic Dill Pickles: If you love garlic, add more cloves or infuse with garlic powder for a stronger bite.
- Herbed Dill Pickles: Mix in other herbs like thyme or oregano for a unique twist.
- Lemon Dill Pickles: Add slices of fresh lemon or lemon zest to give a citrusy flavor.
These variations can make this simple recipe even more fun and tailored to your taste.
FAQs
Can I use any type of cucumber for this recipe?
While you can use any cucumber, small ones like Kirby or pickling cucumbers are typically the best choice. They are firmer and have fewer seeds.
Do I need to sterilize the jars?
For this refrigerator pickle recipe, sterilizing the jars is not mandatory, but it is a good practice to ensure they are clean. Just wash them well in hot, soapy water.
Can I process these pickles for long-term storage?
This recipe is designed for the refrigerator and is not suitable for long-term canning methods. However, if you want to can them, you will need to follow proper canning methods to ensure safety.
Making Easy Refrigerator Dill Pickles is a fun project that results in a delicious treat you can enjoy with many meals. With the simple steps and ingredients, you can create a lovely crunch that will bring joy to your table!
Easy Refrigerator Dill Pickles
Ingredients
Method
- Wash the cucumbers thoroughly under running water. Slice them into rounds or spears, or leave them whole.
- Place 2-4 cloves of garlic and 2-3 fresh dill sprigs at the bottom of clean jars.
- Pack the cucumber slices or spears tightly into the jars, leaving about 1/2 inch of headspace at the top.
- In a small saucepan, combine vinegar, water, salt, and optional sugar. Heat until boiling, stirring to dissolve.
- Pour the hot brine over the cucumbers, ensuring they are fully submerged, and add any remaining dill sprigs on top.
- Let the jars cool to room temperature, then seal them and place in the refrigerator.
- Allow the pickles to marinate in the refrigerator for at least 24 hours before consuming, preferably a few days.

